July 21, 2014

SharedPreferences and SQLite Storage

Storing data across multiple application sessions is important. To enable the application to persist data , there are many options available but here we going to discuss just two methods. SharedPreferences is used to store small pieces of key-value pairs while the SQLite database is used to persist complex data. Let's first see how to store and access data from SharedPreferences.

SharedPreferences:

Remember that the sharedPreferences is retrieved with the current activity as the name when calling getPreferences(MODE_PRIVATE);. You could also save preferences with custom name by fetching sharedPreferences as follows. 
    getSharedPreferences('GeoPref', mode);
If a SharedPreference named GeoPref is not present then a new one is created and returned.

Storing data
1. Get reference to SharedPreference from an activity using the following code. 
     final SharedPreferences prefs = getPreferences(MODE_PRIVATE);
This will call the getSharedPreferences('currentActivityName', mode) method of the context object.
2. Store key, value into the map using the following code
    SharedPreferences.Editor editor = prefs.edit();
    editor.putInt("HIGH_SCORE", val);
    editor.commit();

Read data
Just call prefs.getInt("HIGH_SCORE", -2). If such a key is not present then the passed -2 is returned. 

SharedPreferencesFragment

This class is useful for presenting a list view of needed preferences to be saved for an application. It is very useful when showing, editing by displaying a dialog and saving multiple settings for an application with just few lines of code.

1. Load the fragment just like a normal fragment by defining it in xml or by calling it dynamically
    setContentView(R.layout.user_prefs_fragment);
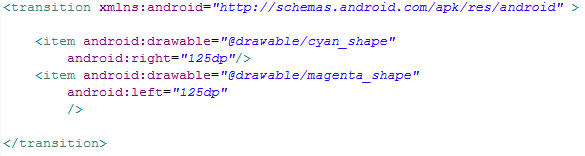
The user_prefs_fragment xml is shown below.
Note that you can reference an inner class in xml using the symbol '$'

2. Load the preference and register the change listener for setting the initial value of uname as shown below
The xml from which the items to be loaded on to the fragment is defined in R.xml.user_prefs as shown below
The above file helps to display a dialog box to accept changes when a particular key-value is edited. This is what makes SharedFragment so easy to view and edit existing preferences.

Initially there is no value set for the uname key . So the changeListener is called back by invoking onSharedPreferenceChanged as shown below.

July 14, 2014

Multimedia - Playing Audio

Audio manager is used to play sounds in an activity. Different ways of using the audiomanager is shown below,


Following are the steps to play sound effects.
1. Get reference to the AudioManager
mAudioManager = (AudioManager) getSystemService(AUDIO_SERVICE)
2. Create a SoundPool
    mSoundPool = new SoundPool(1, AudioManager.STREAM_MUSIC, 0);
3. Load the sound
mSoundId = mSoundPool.load(this, R.raw.slow_whoop_bubble_pop, 1);
4. Housekeeping for soundmanager
5. Play the sound
mSoundPool.play(mSoundId, leftVolume, rightVolume, priority, loop, rate);

Using Fragments

Fragments were added to Android 3.0 to better support user interfaces for devices with 
large screens, such as tablets. Every fragment needs a host activity and a single fragment can span across multiple activities. The fragment by itself has several life-cycle methods as shown below,

There are two ways to load a fragment into an activity
1)Declare it statically using the using the Activity's layout file 
2)Add it programmatically using the FragmentManager

Static Fragment:

Define the fragments to be hosted in the current activity using the activity layout file as shown below,
Now when the activity is loaded. The corresponding fragments are attached and the life-cycle methods  of both fragments are invoked. Once the fragments are loaded as defined statistically in the above xml, the view of fragment is loaded in onCreateView(). 

TitlesFragment is the one which inherits the ListFragment class and thereby all list related actions such as setting the Single choice mode can be done in the onActivityCreated() as shown below.
Another point to note here is that a ListSelectionListener interface is defined here which needs to be implemented in the hosting activity. This is done typically in any fragment scenario because the hosting activity has reference to both the fragments and can control the data shown in a fragment different from the fragment from which the selection was done. The activity typically acts like the Orchestra conductor by implementing the ListSelectionListener's onListSelection() method as shown below,
The TitleFragment's onListItemClick hook method call this onListSelection method as shown below
Thus the corresponding details of the clicked title  is displayed in the textview of the DetailsFragment.

Dynamic Fragment:

Here the activity xml does not define the fragments instead only defines the views which are going to be loaded for the corresponding fragments. So we have to programmatically call the fragments to be hosted in the current activity.

In the activity's onCreate method load the fragments using the fragmentManager as shown below,
In the static fragment example, both fragments were loaded at the same time. Here first the title is loaded and the second fragment is loaded and the entire activity layout is adjusted via a addOnBackChangedListener callback method.
Rest of the fragment implementation is similar to the static example. Examples were referred from Dr.Adam Porter's lectures.

July 03, 2014

Comparable & Comparator API

Total order
A total order is a binary relation ≤ that satisfies:
・Antisymmetry: if v ≤ w and w ≤ v, then v = w.
・Transitivity: if v ≤ w and w ≤ x, then v ≤ x.
・Totality: either v ≤ w or w ≤ v or both.
Ex.
・Standard order for natural and real numbers.
・Chronological order for dates or times.
・Alphabetical order for strings.

 Note that the <= operator for double is not a total order. Double.NaN <= Double.NaN is false.

Comparable API
Implement compareTo() so that v.compareTo(w)
・Is a total order.
・Returns a negative integer, zero, or positive integer
if v is less than, equal to, or greater than w, respectively.
・Throws an exception if incompatible types (or either is null).

Tips:
To sort an Array, use the Arrays.sort().
To sort an ArrayList, use the Collections.sort().

Natural Sorting of numbers:

Output: 1,2,3,5,7,10,16,23,46

Incorrect sorting of cars:
Let us consider taking a car class with the data members as shown below.


Here the client tries to sort an array consisting of three cars. But do you see the problem?

Yes. This cannot be sorted by Java because we haven't told it what is the order to be followed and which data member should be considered to be sorted. This is why we implement the comparable interface. The output of above as expected would be.

Correct Sorting of Cars:
Shown below is the class diagram:

Here the Car class now implements the comparable Interface and defines the total order in compareTo() method.
Output: Mazda,Honda,Toyota

Correct Sorting of Cars with different properties:
You do not have to implement Comparable but you have to create static members of type Comparator which overrides the method compare(). Below is shown the class diagram.
Code:
package george.comparablesWithComparator;

import java.util.Comparator;

public class Car{

private String make;
private String model;
private int cost;
public String getMake() {
return make;
}
public void setMake(String make) {
this.make = make;
}
public String getModel() {
return model;
}
public void setModel(String model) {
this.model = model;
}
public int getCost() {
return cost;
}
public void setCost(int cost) {
this.cost = cost;
}
public static Comparator carCostComparator = new Comparator() {

@Override
public int compare(Car c1, Car c2) {
if(c1.cost < c2.cost)
return -1;
else if(c1.cost > c2.cost)
return 1;
else
return 0;
}
};
public static Comparator carModelComparator = new Comparator() {

@Override
public int compare(Car c1, Car c2) {
if(c1.model.compareTo(c2.model) < 0)
return -1;
else if(c1.model.compareTo(c2.model) > 0)
return 1;
else
return 0;
}
};
public static Comparator carMakeComparator = new Comparator() {

@Override
public int compare(Car c1, Car c2) {
if(c1.make.compareTo(c2.make) < 0)
return -1;
else if(c1.make.compareTo(c2.make) > 0)
return 1;
else
return 0;
}
};
}


package george.comparablesWithComparator;

import java.util.Arrays;

public class ClassClient {

/**
* @param args
*/
public static void main(String[] args) {
Car car1 = new Car();
Car car2 = new Car();
Car car3 = new Car();
car1.setCost(1000);
car1.setMake("Honda");
car1.setModel("City");
car2.setCost(120);
car2.setMake("Mazda");
car2.setModel("ZX-1");
car3.setCost(90888);
car3.setMake("Toyota");
car3.setModel("Qualis");
Car[] carArray = {car1, car2, car3};
System.out.print("Sorting by Make: ");
Arrays.sort(carArray,Car.carMakeComparator);
for(Car c : carArray)
{
System.out.print(c.getMake() + ",");
}
System.out.println();
System.out.print("Sorting by Model: ");
Arrays.sort(carArray,Car.carModelComparator);
for(Car c : carArray)
{
System.out.print(c.getModel() + ",");
}
System.out.println();
System.out.print("Sorting by Cost: ");
Arrays.sort(carArray,Car.carCostComparator);
for(Car c : carArray)
{
System.out.print(c.getCost() + ",");
}
}

}


July 02, 2014

The crux of Java collections - Stack, Queue & Bags

Collections is one of the most important standard library available in Java. It allows developers to take the power of generics and Iterator and develop code which expects less input from the user and allows good reusability. All references are from Dr.Sidgewich codebase. Collections can be implemented using linked list or array.

Here I am going show my implementation of Queue using basic re-sizing array, implements Iterable interface and is generic. Below is shown the class diagram. This can be easily ported into stack and bags using simple logic changes.

Code:

package george.queue;

import java.util.Iterator;

public class VariableCapacityQueue implements Iterable {
private E[] s;
private int N = 0;

public VariableCapacityQueue() {
s = (E[]) new Object[1];
}

public boolean isEmpty() {
return N == 0;
}

public void enqueue(E item) {
if (N == s.length)
resize(2 * s.length);
s[N++] = item;
System.out.println("array size is "+s.length);
// array size increament verified
}

public E dequeue() {
// return s[--N];//just moves the pointer but not the element//So
// modifying code
E temp = s[0];
s[0] = null;
moveElements(s.length);
N--;
// The above two steps prevents loitering
if (N > 0 && N == s.length / 4)// otherwise will terminate at -1 itself
resize(s.length / 2);
System.out.println("array size is " + s.length);
return temp;
}

private void resize(int capacity) {
E[] copy = (E[]) new Object[capacity];
for (int i = 0; i < N; i++)
copy[i] = s[i];
s = copy;
}

private void moveElements(int capacity) {
E[] copy = (E[]) new Object[capacity];
for (int i = 1; i < N; i++)
// first element in queue removed so n reduced by 1
copy[i - 1] = s[i];
s = copy;
}

public class ListIterator implements Iterator {
private int i = 0;

public boolean hasNext() {
return i < N;
}

public void remove() {
}

public E next() {
return s[i++];
}
}

public Iterator iterator() {
return new ListIterator();
}


}


Performance:

Order of Growth:
Running time is worst when compared to Linked List implementation because of moveElements() method being called each time something is dequeued.  Thus dequeue operation has a order of growth  O(N^2). Enqueue operation consumes in the order of O(N) for elements of size N. Any suggestion to improve dequeue implementation is welcome.

Memory:
The memory consumption will be almost similar to the one shown below. Expect for the fact that we are using generics so the 8N + 24 for String  will be xN + 24 depending upon the datatype used for storing in the array. Similarly padding will change accordingly.

July 01, 2014

UnionFind for Dynamic connectivity

Union Find is used to find the connection between two objects.
Why do we need Union Find algorithm?

There are three approaches to implement this each with it's own complexity.
1. Quick Find:
Simplest but does union is quadratic in nature
2. Quick Union:
Union is Linear time but find also becomes linear which is constant in Quick find
3. Weighted QuickUnion:
Union and find are logarithmic in nature

Implementation:
The class diagram of my implementation uses code from Dr.Robert Sidgewich's code base. Here I use the template method and strategy pattern to do a quick comparison of performance of all the three types.
The following images show how the implementation is done.
UF is the abstract class from which all other union find classes inherit


UFclient uses the strategy pattern by invoking run() from the main factory method.

QuickFind inherits from UF and uses a single array with a simple idea to find connectivity as shown below.

 QuickUnionUF inherits from UF and uses a single array with tree structure to find connectivity as shown below.

QuickUnionUF inherits from UF and uses a single array with tree structure to find connectivity as shown below. It goes one step further to use a second array for maintaining and balancing weight on the tree.


Performance:

Significant performance difference can be observed from the output as shown below

Time taken for QuickFindUF is 177
Time taken for QuickUnionUF is 66
Time taken for WeightedQuickUnionUF is 25

You can see the difference between Quadratic vs Linear vs Logarithmic time. They are in the ratio 7:3:1

June 30, 2014

Why do we need better algorithms?

This is the most fundamental question every student must ask himself before taking a course on Algorithms. Rather than talking too much about algorithms let me straight away give examples. All the shown examples are from the speech 'Beyond Computation - Michael Sipser'
Problem 1: Finding the factorial of a large number.
We still don't know whether there is any other possible way to find the solution or not.
Problem 2: Finding the largest clique in a given graph with 100 nodes
But trying to find a large clique in the below figure is very difficult for the computer.
Solution: Trying to find the analogy of magnet in mathematics
If you can find the magnet, you are one of the most Intelligent on the planet.
Other Problems:
So you can see that the biggest challenge is 
This is the ultimate reason why we need better algorithms.
To understand more, let me show you the difference between P and NP problems
If P = NP is proved, then we do not need to search for a search algorithm else we need to search. Whether P = NP or P != NP is a mystery.

NP-Completeness
This is the first step taken by humans towards solving an NP problem. NP-Completeness defines that a set of problems are linked to each other and can be easily transformed into each other which means if there is a solution to one problem, then the solution for the other can be found but the reverse is not true. Eg: Factoring can be converted into CLIQUE but not CLIQUE into Factoring

NP-Hard:
There are NP problems for which even checking is not possible. These are called NP-Hard. Eg of such a problem is Chess.

Will it ever be solved?

Understanding Screens

Android runs on a variety of devices that offer different screen sizes and densities. For applications, the Android system provides a consistent development environment across devices and handles most of the work to adjust each application's user interface to the screen on which it is displayed. There are 4 key terms you should remember. They are,
1. Screen Size:
Actual physical size, measured as the screen's diagonal.
For simplicity, Android groups all actual screen sizes into four generalized sizes: small, normal, large, and extra large. The actual to general mapping is shown below,
xlarge screens are at least 960dp x 720dp
large screens are at least 640dp x 480dp
normal screens are at least 470dp x 320dp
small screens are at least 426dp x 320dp

2. Pixels Per Inch(PPI) or Dots Per Inch(DPI):
The quantity of pixels within a physical area of the screen
For simplicity, Android groups all actual screen densities into four generalized densities: low, medium, high, and extra high. The actual to general mapping is shown below,

3. Density Independent Pixels(DP):
A virtual pixel unit that you should use when defining UI layout, to express layout dimensions or position in a density-independent way.
Calculation: px = dp * (dpi/160).
Let's for example take Google Nexus 5 & Google Nexus 4. According to DPI love , Google Nexus 5 has 445dpi and Google Nexus 4 has 318dpi. Now when the developer defines a view to be having a width of 40 dp , the corresponding pixels will be px5 = 40 * (445/160) = 111 for Google Nexus 5 and px4 = 40 * (318/160) = 80. So you can see that , the view is optimized according to the specific screen using a simple logic. Without this approach, directly mentioning the size using px or cm will give a inconsistent view across multiple screens as shown below.

Best Practices:

1. The following is a list of resource directories in an application that provides different layout designs for different screen sizes and different bitmap drawables for medium, high, and extra high density screens.

res/layout/my_layout.xml             // layout for normal screen size ("default")
res/layout-small/my_layout.xml       // layout for small screen size
res/layout-large/my_layout.xml       // layout for large screen size
res/layout-xlarge/my_layout.xml      // layout for extra large screen size
res/layout-xlarge-land/my_layout.xml // layout for extra large in landscape orientation

res/drawable-mdpi/my_icon.png        // bitmap for medium density
res/drawable-hdpi/my_icon.png        // bitmap for high density
res/drawable-xhdpi/my_icon.png       // bitmap for extra high density

2. Always design the screen with a mobile or tablet in mind. Specifically, when selecting resources based on the size qualifiers, the system will use resources designed for a screen smaller than the current screen if there are no resources that better match (for example, a large-size screen will use normal-size screen resources if necessary). However, if the only available resources are larger than the current screen, the system will not use them and your application will crash if no other resources match the device configuration (for example, if all layout resources are tagged with the xlarge qualifier, but the device is a normal-size screen).

3. To create alternative bitmap drawables for different densities, you should follow the 3:4:6:8 scaling ratio between the four generalized densities. For example, if you have a bitmap drawable that's 48x48 pixels for medium-density screen (the size for a launcher icon), all the different sizes should be:

36x36 for low-density
48x48 for medium-density
72x72 for high-density
96x96 for extra high-density

4. Use wrap_content, fill_parent, or dp units when specifying dimensions in an XML layout file

5. Do not use hard coded pixel values in your application code

6. Do not use AbsoluteLayout (it's deprecated)

7. Supply alternative bitmap drawables for different screen densities

Working with Animation

There are two ways to work with animation. Below chart shows various ways to animate
The two types of animation are,

  1. View Animation
  2. Property Animation
Let's look each of this type of animation in detail.

1. View Animation:

View animation is simple and Android provides three support classes. They are, 
  • TransitionDrawable
  • AnimationDrawable
  • Animation
    TransitionDrawable
This drawable is used to transit between two drawables on a single view. Create a TransitionDrawable class and start the animation as shown below.
R.drawable.shape_transition defines the transition between two drawables and this xml file looks like the following. Here you can see that the transition is between two shapes defined in an xml which can be easily replaced by two images.
    AnimationDrawable
This class is used to provide a slideshow kind of animation where you provide a set of drawables which is drawn to the screen in an imageView in a given sequence with the given time. The code below shows how the class must be created and used. Involes three steps.
First is to find the imageView in which the transition should be shown.
Second the tranisition is set as background to the imageView and
Thirdly, ref to the animation drawable is acquired and animation can be started/stopped
This is also a good time to discuss when to use onWindowFocusChanged() and onResume(). As a general rule, however, a resumed activity will have window focus... unless it has displayed other dialogs or popups that take input focus, in which case the activity itself will not have focus when the other windows have it. Likewise, the system may display system-level windows (such as the status bar notification panel or a system alert) which will temporarily take window input focus without pausing the foreground activity. Thus use onWindowFocusChanged() when you want an action to be performed even in scenarios where onResume() may not be called. Shown below is the code to start the animation in onWindowFocusChanged() method.

    Animation
This class helps us to animate a view by changing properties of the view. Multiple transformations can be applied conveniently using this method.
First define your animation file and store it in res/anim folder.
Now load the animation in the xml file into the current activity using the following calls
Finally start the animation using the startAnimation() callback as shown above

2. Property Animation:

Sometimes you want animate other objects other than view, for this purpose the Android provides the Property Animation framework. Helps to change generic properties of objects over time.